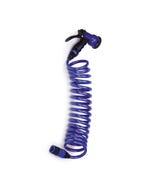
Master Equipment Dog Grooming Tub Faucet
ITEM #:
TP21740
Chrome-plated Master Equipment™ Tub Faucet fits grooming tubs with 4" center mounts. Innovative handle design is easy to operate when hands are wet.


Related Products
Check items to add to the cart or


- Handles are easy for wet, soapy hands to shut off and on
- Unique plastic spacer plate provides a snug, leak-proof attachment to tub wall
- Durable construction gives years of dependable service
Fits all grooming tubs with 4" center mounts. Assembly
required.
Size: Thread size is ½", 14 TPI (Threads Per
Inch); Fits 4" center mounts
| Setting |
Water Flow |
| 20 PSI |
6.75 gallons |
| 30 PSI |
8.19 gallons |
| 40 PSI |
9.24 gallons |
| 50 PSI |
10.01 gallons |
| 60 PSI |
10.93 gallons |
Faucet extends 1.75" from the tub wall
Standard Kitchen Faucet
Parts List:
- Faucet Assembly (1)
- Plastic Spacer Plate (1)
- Mounting Nuts (2)
- Riser Nuts (2)
To Install:
- Shut off water supply before installation.
- Apply a thin layer of plumber’s putty to the top of the Plastic Spacer Plate (B) and attach to the underside of the Faucet Assembly (A). Apply a layer of putty to the underside of the spacer plate and attach faucet onto the tub wall. Make sure faucet is centered properly on the 4" center mounting holes. Tub wall should be clean and dry for proper putty adhesion. Any additional predrilled faucet holes should be plugged.
- Attach a Mounting Nut (C) to each valve stem and tighten to secure. Do not overtighten. Wipe off any excess putty from tub and faucet surfaces with a clean, soft cloth.
- Attach hot and cold water supply hoses to the valve stems with Riser Nuts (D). Do not overtighten.
- Turn on water supply and turn on faucet to check for leaks.
Note: Most US municipal plumbing codes require atmospheric type vacuum breakers (AVBs) on shampoo tubs to prevent harsh chemicals from entering the potable water supply. These chemicals include shampoos, color chemicals, and neutralizers. If the spray hose is left in the tub, contaminated water could be siphoned into the drinking water system. The Master Equipment Faucet Vacuum Breaker is designed for an exact fit.
Download Specifications (PDF File)

| UPC | 721343217046 |
|---|---|
| Brand | Master Equipment |
| Product Grouping | Own Brand |
| UOM | EA |
| ERP Status | Active |